Activities: Activities are what your registrants are signing up for.
Activity Setup:
Before building your activities, make certain you previously added registrant types and activity groups.
When you first get to the page, it will be a blank canvas:
![]()
Add activities manually in five steps.
To get started click on the New Activity button.
Step 1: Activity Details
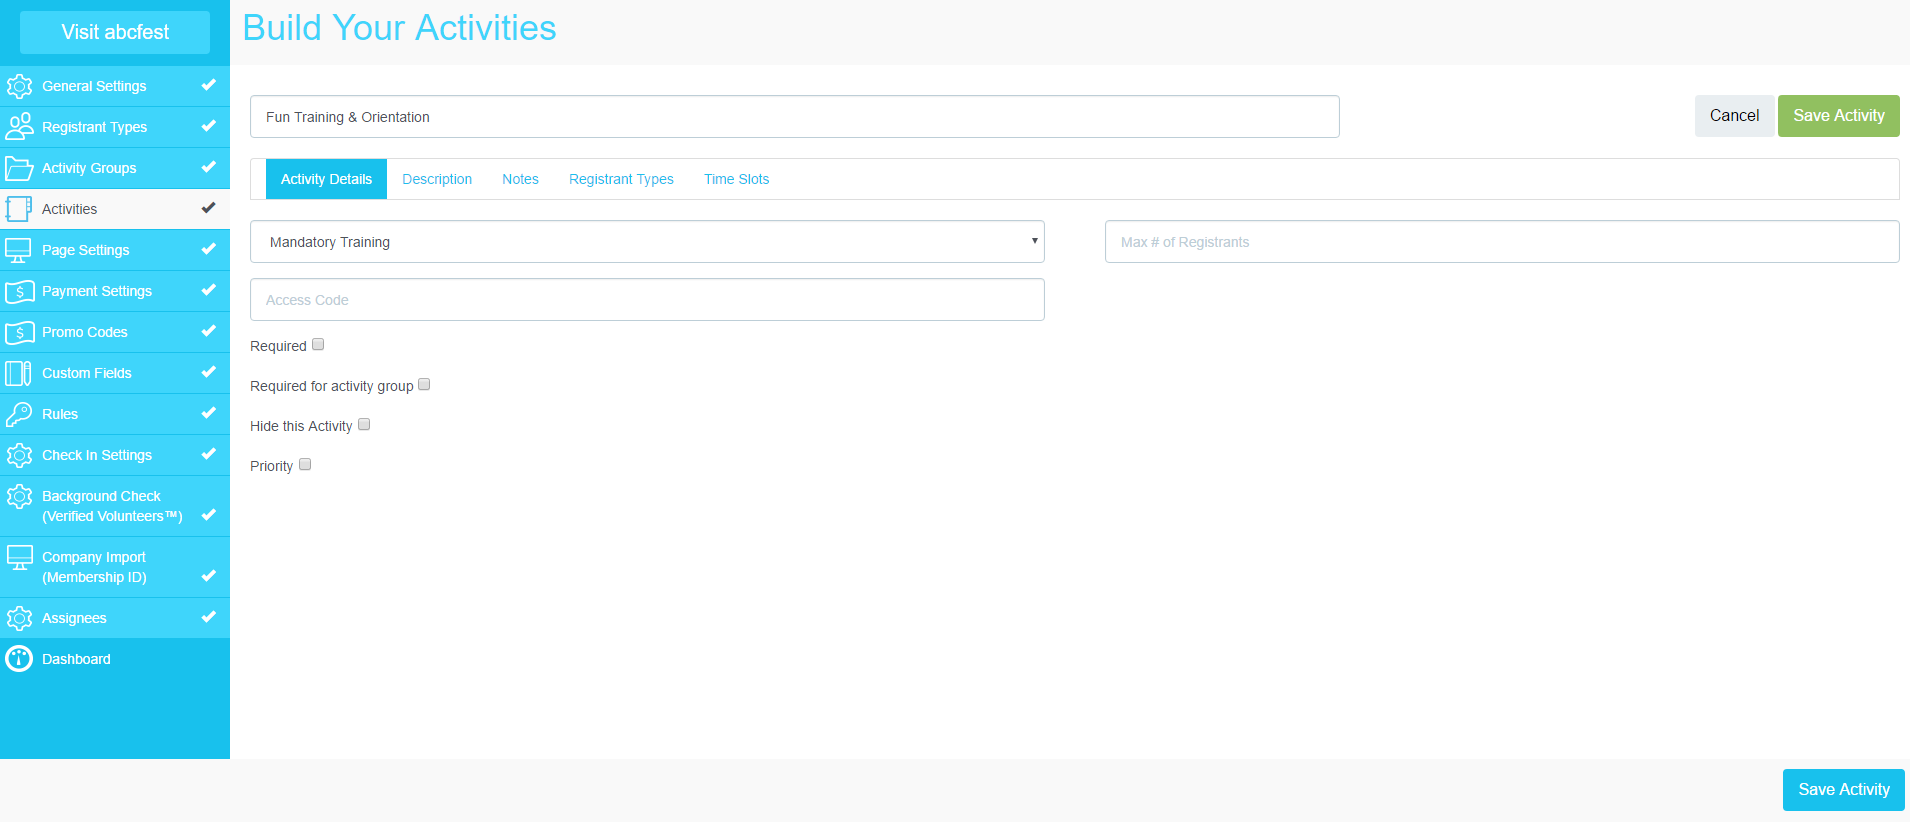
- Name: Add the name of the activity as you want it to appear on the front end.
- Activity Group: Select an activity group to link the activity to.
- Max # of Registrants: Use this maximum if your activity does not have a time slot. Once the number of registrants reaches the maximum, the activity will show as full and will not allow new registrants to select it on the front end.
- Access Code: Hide activities with access codes if you only want a select group of people who have been given the access codes to be able to see and register for them. Those without the access code cannot see the hidden activities.
- Required: Check the box if you wish to make an activity required. Note that if you make an activity required, it will be required for all registrants with access to the activity. We do not recommend making an access coded activity required as it will result in an error for registrants who do not have the code to access the activity.
- Required for Activity Group: Check this box to require this activity for the activity group it is linked to. If a registrant selects another activity under this linked activity group, they will also have to select this activity to continue registration. This is usually used if the activity group requires specialized training or an additional fee.
- Hide This Activity: Check this box to hide an activity on the front end from all registrants. The activity will still be visible on the admin side and on reports.
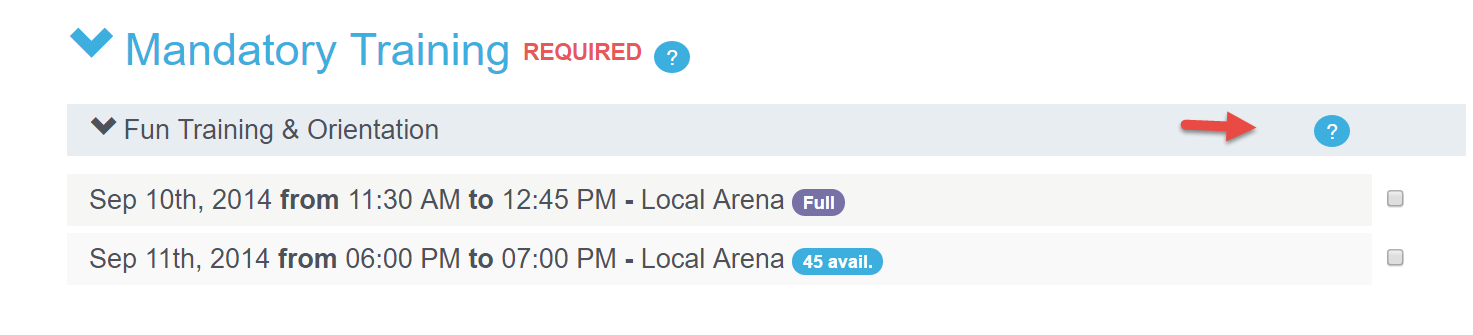
- Priority: Check this box if you would like to flag the activity as a high priority. It will add a visual on the front end (as seen below).

Step 2: Description
The description is used to give registrants additional information about the activities.
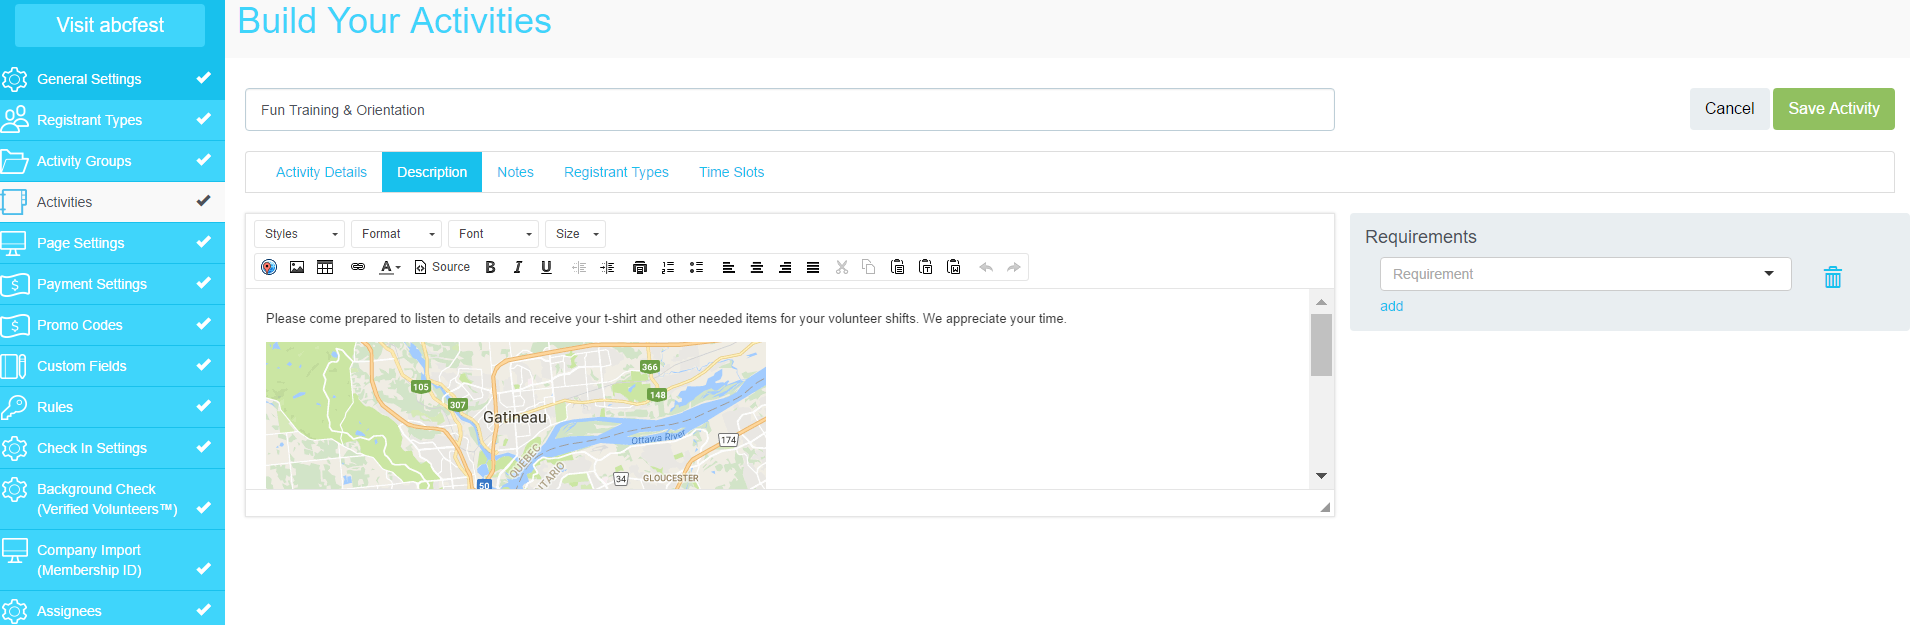
The description will be visible on the front end under a "?" next to the activity name.
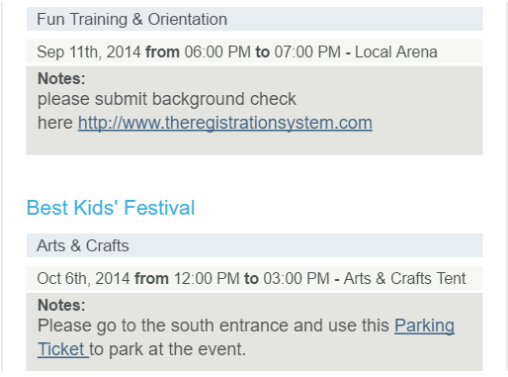
Step 3: Notes
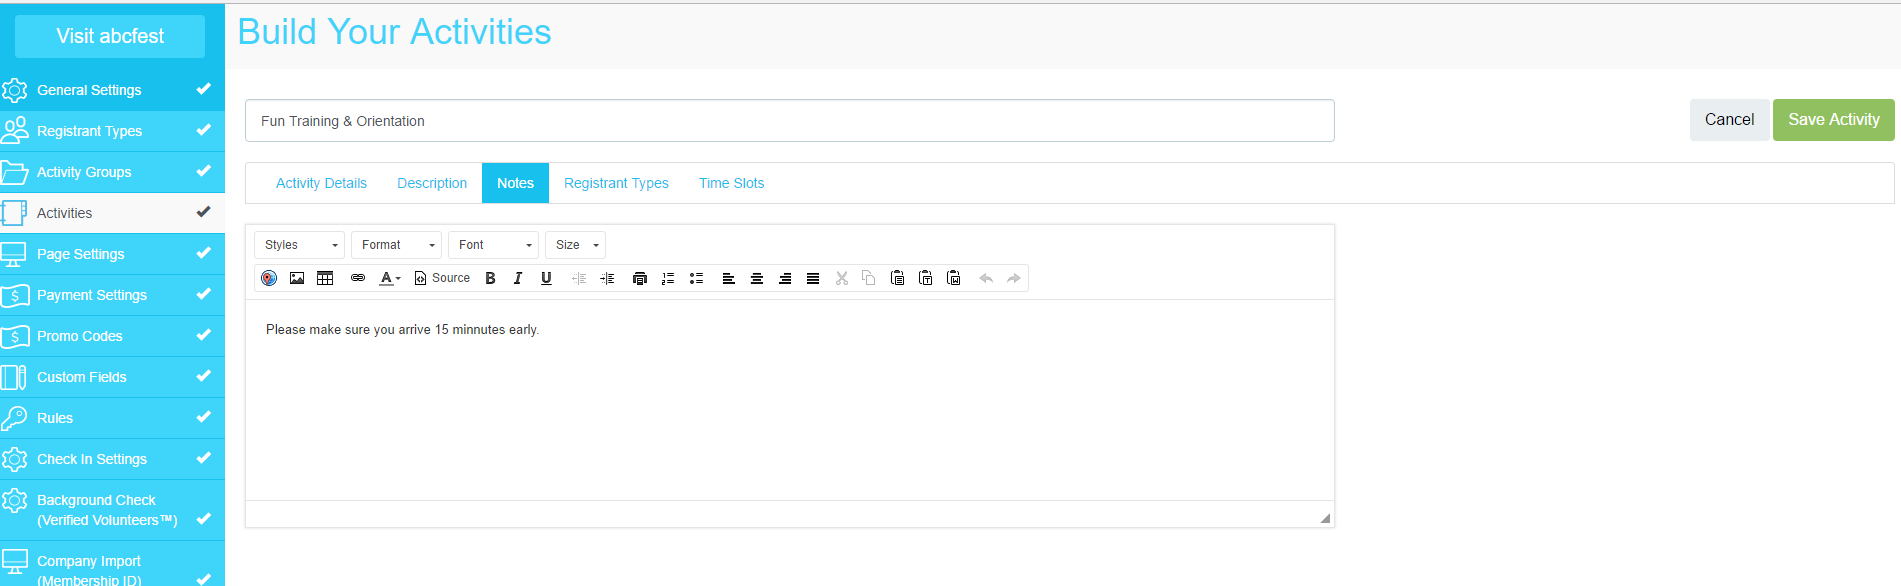
Notes are useful to add important information about the activity that you don't want your registrants to miss.
Clients have used this to:
- Add instructions on location and meeting time for the activity
- Include a link to parking pass
- Include background check links for the specific activity
- Include onsite contact information
- Include online training material for the specific activity
Notes will only show on the registrants schedules from their confirmation email.
Step 4: Registrant Type Selection

This is a very important step in your site building. At this point, you are determining who should have access to register for this specific activity.
If you do not link the activity to any registrant type, the activity will not be visible on the front end or admin side.
To link the activity, simply select the registrant type from the drop down menu. Click on Add to link to multiple registrant types. Please note that registrant types have to be created before you can link them to an activity. See Step 2 Registrant Type.
Step 5: Time Slots
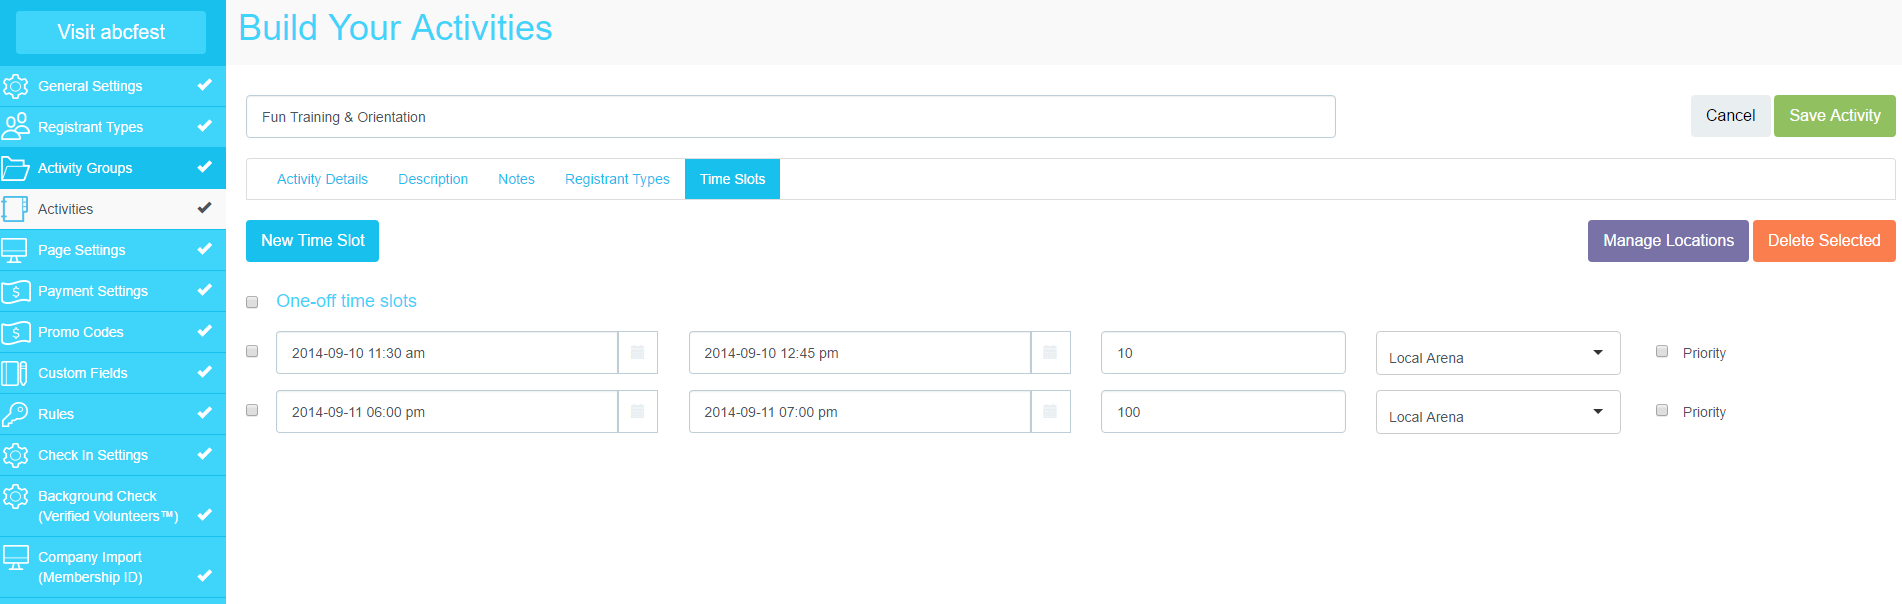
- New Time Slot: Click on New Time Slot to add a time slot.
- Start Date/Time - End Date/Time: Use the calendar option to enter the start date and time, and end date and time.
- Time Slot Max Registrants: Enter the maximum number of registrants allowed for each time slot. Once the number of registrants reaches the maximum, the time slot will show as full (see below) and no one will be allowed to register for this time slot on the front end. However, you can oversell a time slot on the admin side.
- Location: Add the location of the activity/time slot in this column.
- Priority: You can set a time slot as a high priority (see below).

Comments
0 comments
Please sign in to leave a comment.