Activities: Activities are what your registrants are signing up for.
Activity set up:
Before building your activities, make certain you previously added registrant types and activity groups.
When you first get to the page, it will be a blank canvas (see below).
![]()
Import activities in seven steps.
Importing activities is recommended once you have most of your activities/time slots grid ready. The import feature is designed to save you time by adding activities in batches and avoid the manual entry. To skip to manual entry, see Add Activities - Manual Option.
Here are the steps and recommendations to successfully import your activities:
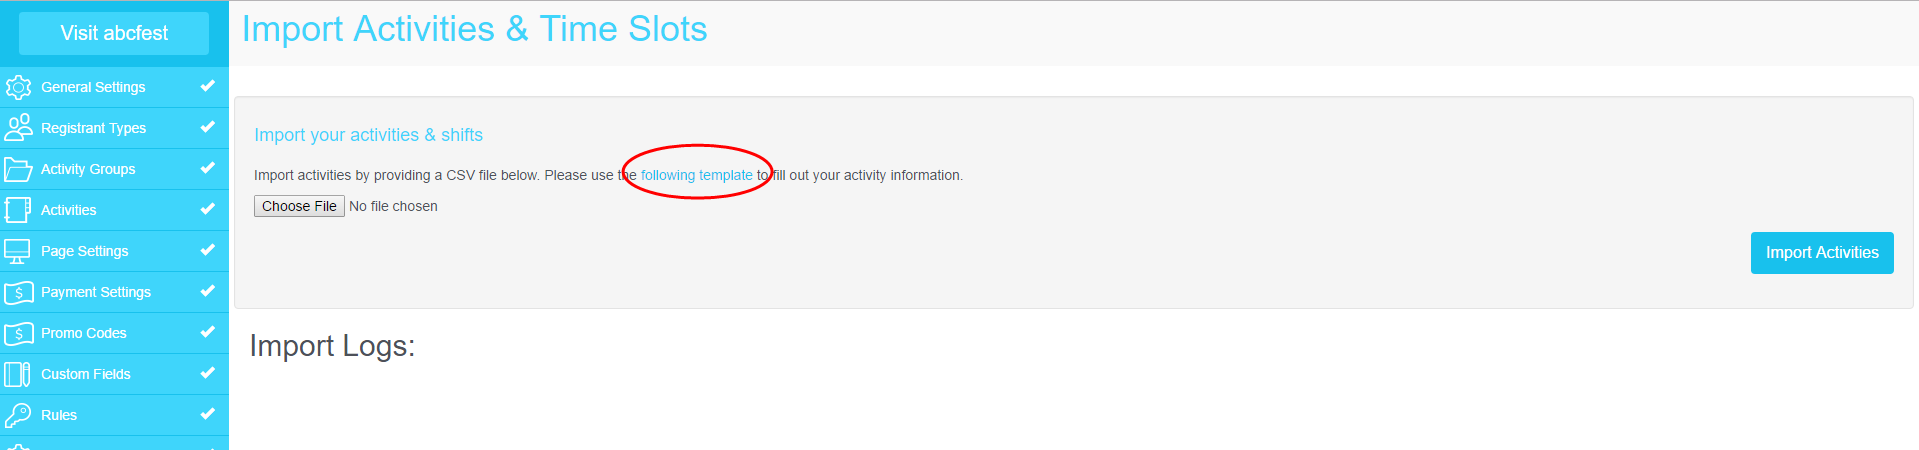
Step 1: Click on the Import Activities button.
Step 2: Click on the Follow Template link to download the import template.
This is a very important step. Not following the template will result in a failed import.
Step 3: Open the template and start entering your data following the template format.
See the template sample shown below.

Step 4: Replace the sample data with your information. Please follow the below recommendations:
- Headers: Leave all the headers exactly the way it shows on the template except for the Registrant Types 1, 2, 3 headers. Replace these headers with the names of the registrant types you created in the system. Make certain you add the registrant types using the exact same spelling as entered on myTRS. We recommend copying and pasting from myTRS to the spreadsheet.
- Activity Groups: Make sure that all the activity groups you enter on the spreadsheet have been previously added to your site on myTRS. Just like the registrant types, activity groups have to match exactly between the import and the system. Copying and pasting from myTRS to the spreadsheet is recommended.
- Activity Name: Add the name of your activity in this column. If your activity has multiple times slots, you will need to repeat the activity group and activity name for each time slot.
- Access Code: Hide activities with access codes if you only want a select group of people, who have been given the access codes, to be able to see and register for them. Those without the access code cannot see the hidden activities.
- Required: Type yes in this section if you want to make an activity required. Note that if you make an activity required, it will be required for all registrants with access to the activity. We do not recommend making an access coded activity required as it will result in an error for registrants who do not have the code to access the activity.
- Activity Max Registrants: Use this maximum if your activity does not have a time slot. Once the number of registrants reaches the maximum, the activity will show as full and will not allow new registrants to select it on the front end.
- Starts at / Ends at: This is where you enter the start date and time and end date and time of a time slot within an activity. Please follow the exact format for date and time and check including spacing between date and time.
- Time Slot Max Registrants: Enter the maximum number of registrants allowed for each time slot. Once the number of registrants reaches the maximum, the time slot will show as full and no one will be allowed to register for this time slot on the front end. However, you can oversell a time slot on the admin side.
- Location: Add the location of the activity/time slot in this column.
- Registrant types: As mentioned above, the registrant types headers have to match exactly the ones entered on your site in myTRS. Please add an "x" under each registrant type that should have access to the activity you are adding.
Step 5: Save your spreadsheet as a CSV file
The only format myTRS will allow is a CSV file. You will find the .csv option in your saving choices.
Step 6: Import
Go back to myTRS - activities - import.
Click on Choose File and select your newly saved CSV file.
Click on Import Activities.
Step 7: Quality control
If some of your activities or time slots are not entered properly on the spreadsheet, the system will generate a list of activities skipped during the import and the reason why they were skipped under Import Logs.
If you see errors under Import Logs, we recommend that you copy and paste the log for future reference or update your spreadsheet before leaving the page. Once you leave the import page, you will no longer have access to your latest import log.
Once your import looks good, we recommend that you check your activities and time slots by either testing your site on the front end or by running an availability report.
Comments
0 comments
Please sign in to leave a comment.