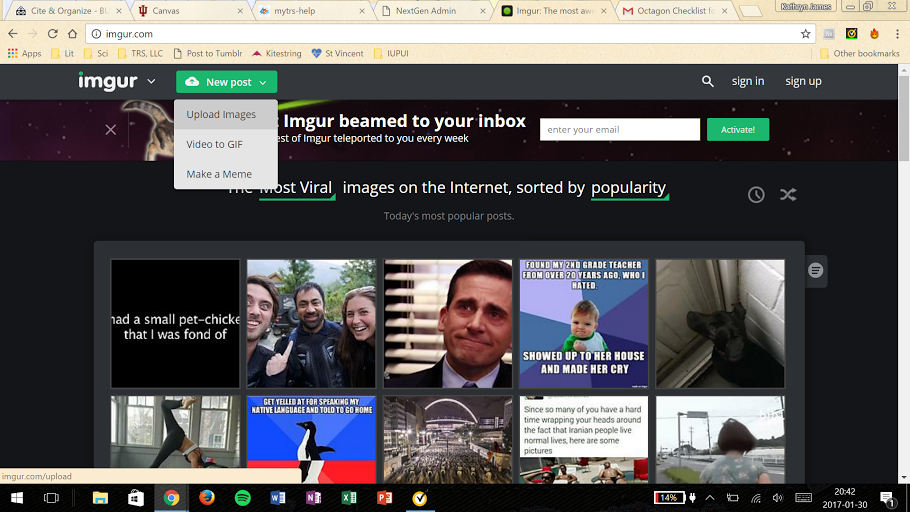
Let's start with the photo uploading process via Imgur, which has proven the most reliable platform. (Dropbox, our prior focus, no longer allows links to be made public as of 2017.)
First, click on the link under the green "New Post" button at the top left of the website and select the first option, "Upload Images".
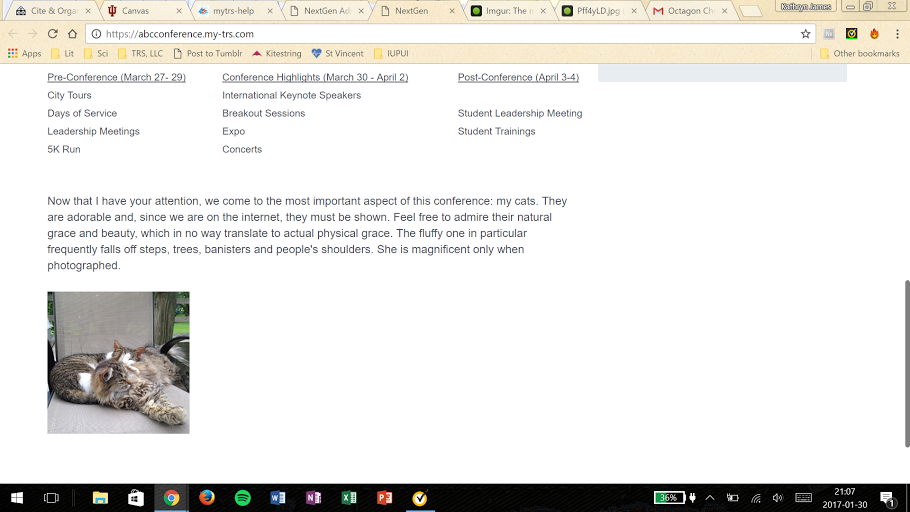
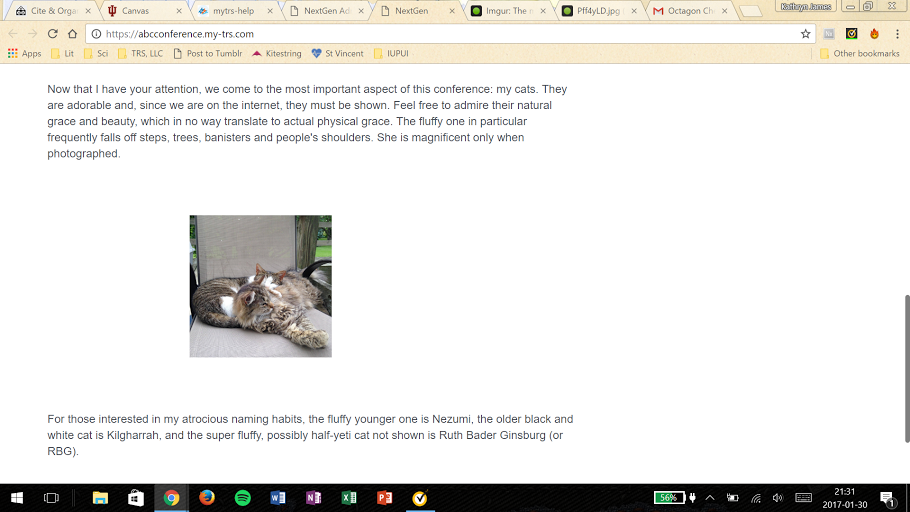
You are then asked to drag your file to the screen or browse for the relevant file to post. Once your file is chosen, it will take you to a new screen with your uploaded file. In my case, the file is a picture of two of our cats (because everyone likes cats).
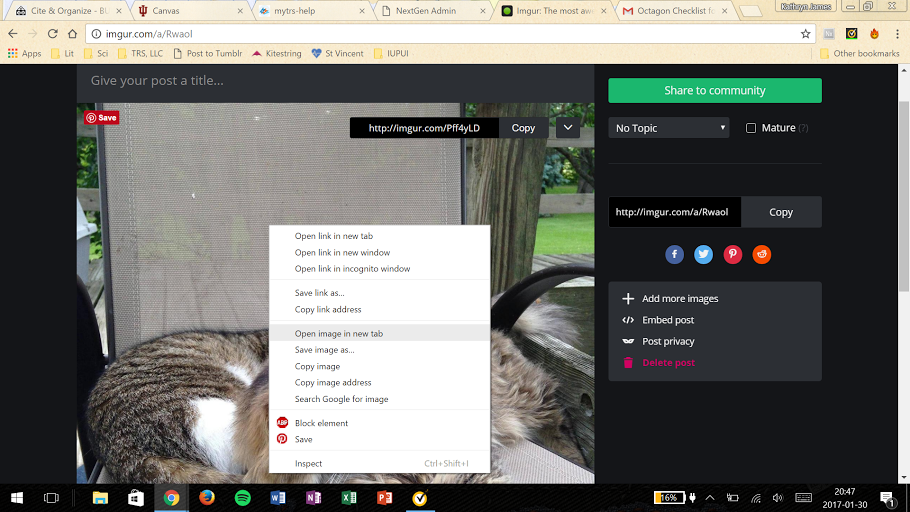
Imgur gives you several options for embedding and posting your picture, but we have a method that is easier to remember. Left click on your picture (not any of the other Imgur links) to get the options menu shown in my screenshot and navigate to the one labeled "Open image in new tab". As it suggests, you will get your image shown, by itself, in a new tab - see the screenshot below.
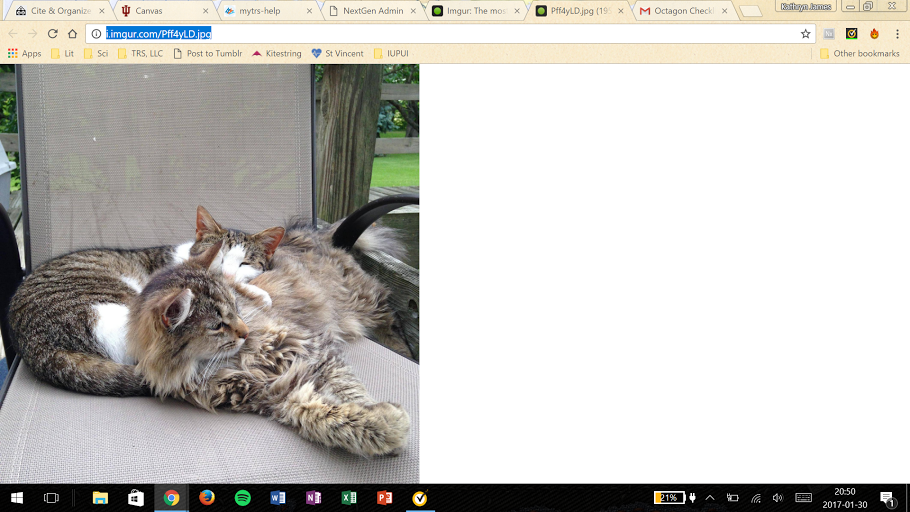
This is the physical, public location of your photo. Notice the address: It is no longer on imgur.com, but on i.imgur.com which is the public file. It also ends in a picture format, such as .png or .jpg. Now copy the address, which in the case of the photo of my cats is http://i.imgur.com/Pff4yLD.jpg . When I go into myTRS to the front page of my site, this is the address that I use to upload my file, as shown below.
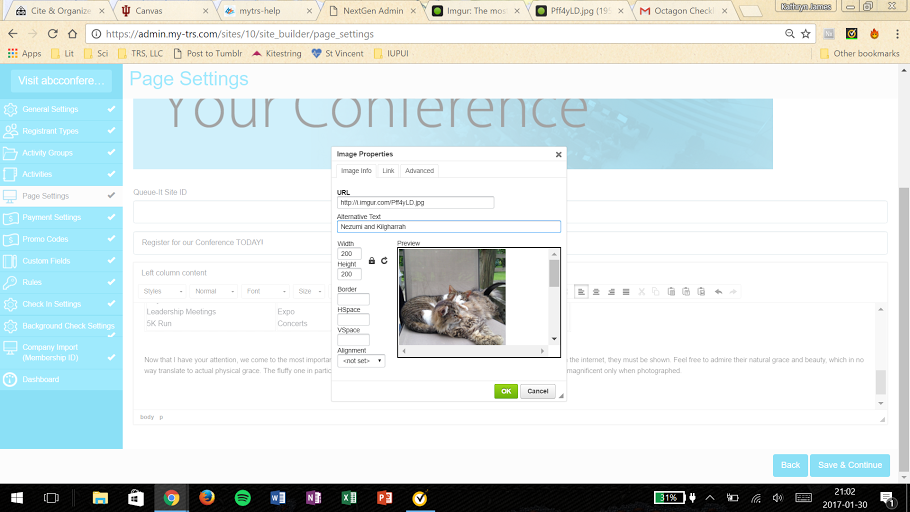
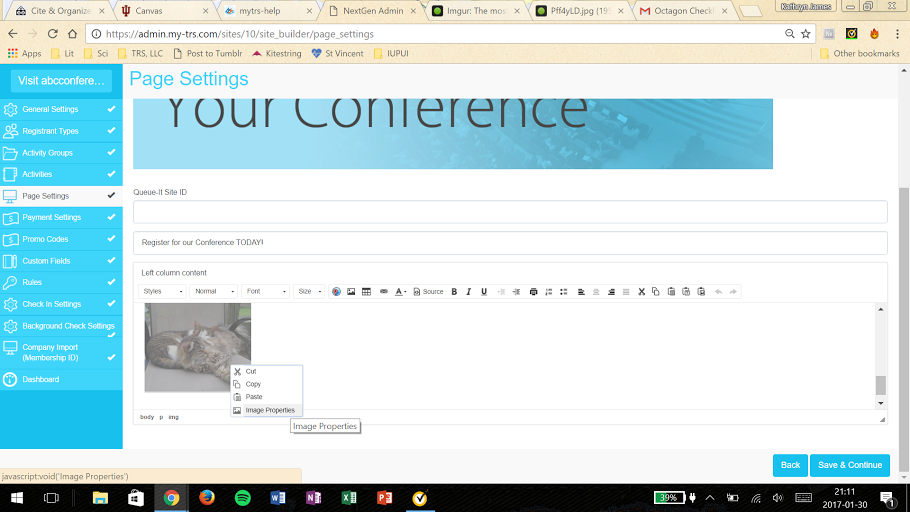
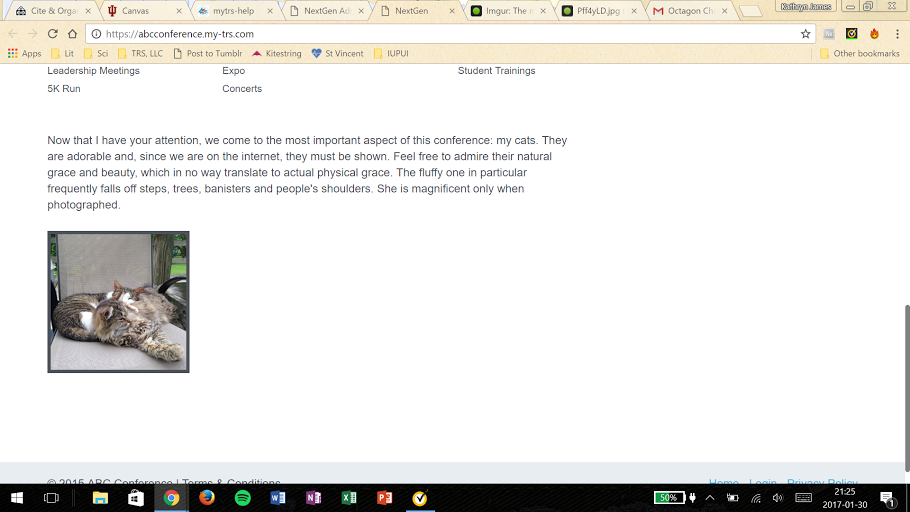
That address copied from Imgur will go into the text box titled "URL". The text box below, "Alternative text," is an optional field that will show text when you hover over the image with your mouse. When I paste this picture to the landing page, it will be located where my cursor was last. In this example, my cursor is at the bottom of the page, a paragraph below my last sentence. See the result below.
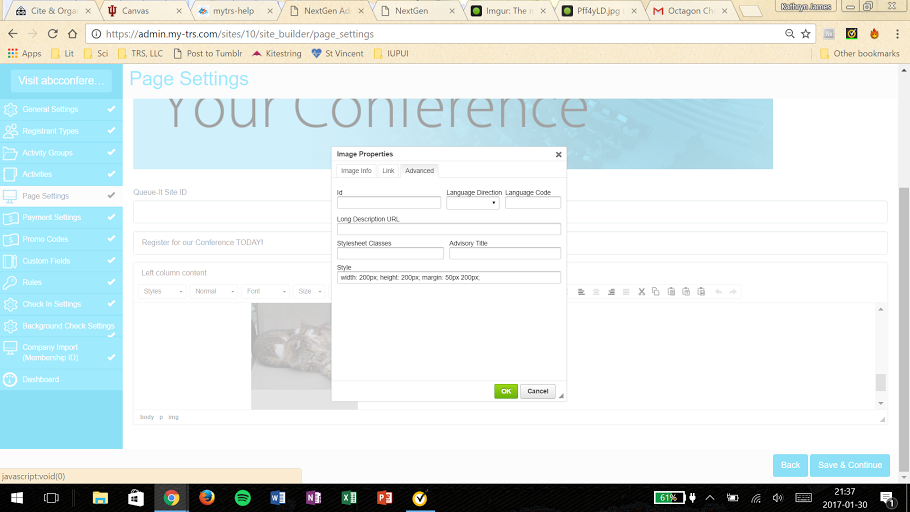
Note that your picture will be aligned to the left by default. Additionally, the size of your picture will be the same as the size that you uploaded. These, along with other qualities of the picture, can be adjusted. To adjust a picture that has already been pasted, left click on the picture and select "Image properties" from the menu. This will bring you back to the options given when you originally posted your picture with the Imgur link.
From here, let's look at all of your formatting options:
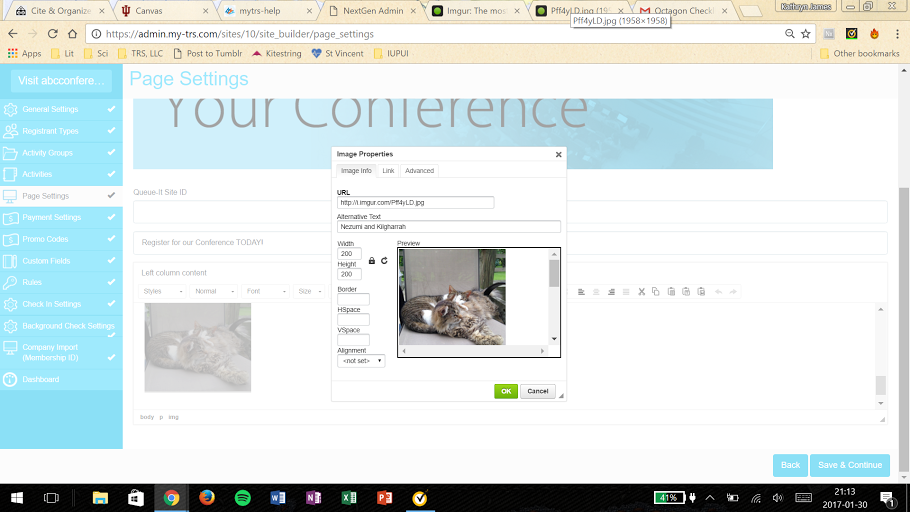
The first two are for sizing "Width" and "Height", and they are measured in pixels. My original image was far too big for the screen at 1958px wide by 1958px tall. I wanted to maintain the ratio of the picture (that is, I didn't want to squish it either vertically or horizontally) so I only had to decide that the "Width" needed to be 200. The default size of the picture is ratio-locked, so when I changed my "Width" to 200, my "Height" also changed to 200 since the width-height ratio is 1:1. Should you want the ratio changed, click on the picture of the lock on the right of the "Width" and "Height" text boxes and the lock will change to an open lock, as seen below.

If the open lock is clicked again, it will revert back to the closed lock and hold the ratio in place as it is calculated by the numbers in the "Width" and "Height" text boxes. I would not recommend unlocking the ratio if a photo is used, unless the photo is of a pattern, otherwise it will distort faces and shapes in the picture.
Next, we come to the three text boxes labeled "Border," "HSpace," and "VSpace." The "Border" text box can be used if you want a border around your picture. This is limited to a black border with the thickness indicated by the number of pixels you type into the "Border" text box. For example, a border of 5 is shown below.
The "HSpace" and "VSpace" text boxes can be used if you want to put in blank space around your picture or move it around the screen. "HSpace" indicates the amount of horizontal distance between the left side and your picture. (If you choose to align your picture on the right side, then it will be the amount of distance between the right side and your picture.) "VSpace" indicates the amount of vertical distance between your picture and the text above and/or below it. For example, if my "HSpace" is 200 and my "VSpace" is 50, I get the result below.
Please take ten minutes, at the very least, to play around with these formatting tools. For those who have experience with HTML coding, there are advanced options (shown below under the "Advanced" tab) for additional styles, stylesheet classes, and so on.
The last option shown on the Image Info tab is called "Alignment." This text editor gives only the option for aligning to the left or right, so to center your picture, you have to play with the "HSpace" until your picture is roughly centered. Depending on the size of your picture, this number will be different.
Finally, at the top of the menu above the URL text box, you will find a tab called "Link."
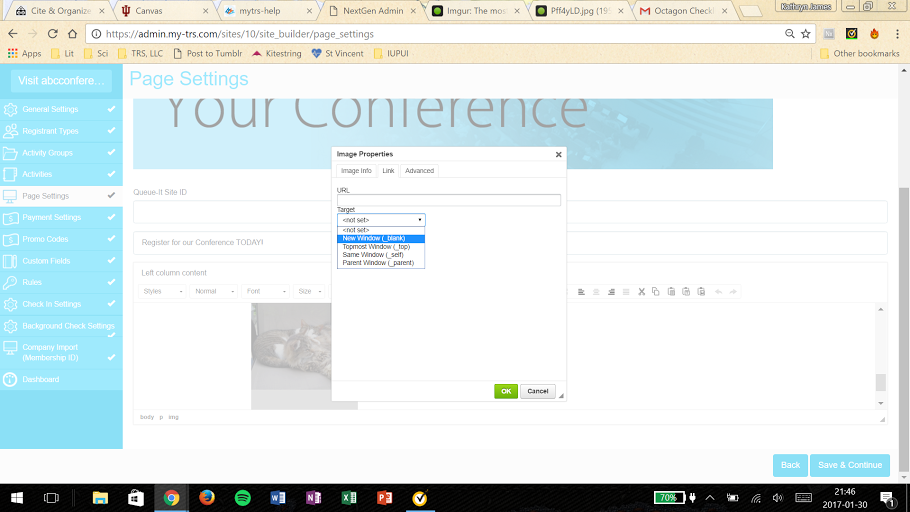
This section allows you to link your photo to another URL, such as a company website or further information on an event or conference. The URL itself goes into the text box while the "Target" will determine where your URL is opened (for example, it can open in the existing page or it can open in a new tab).
Comments
0 comments
Please sign in to leave a comment.